2016年7月18日 星期一

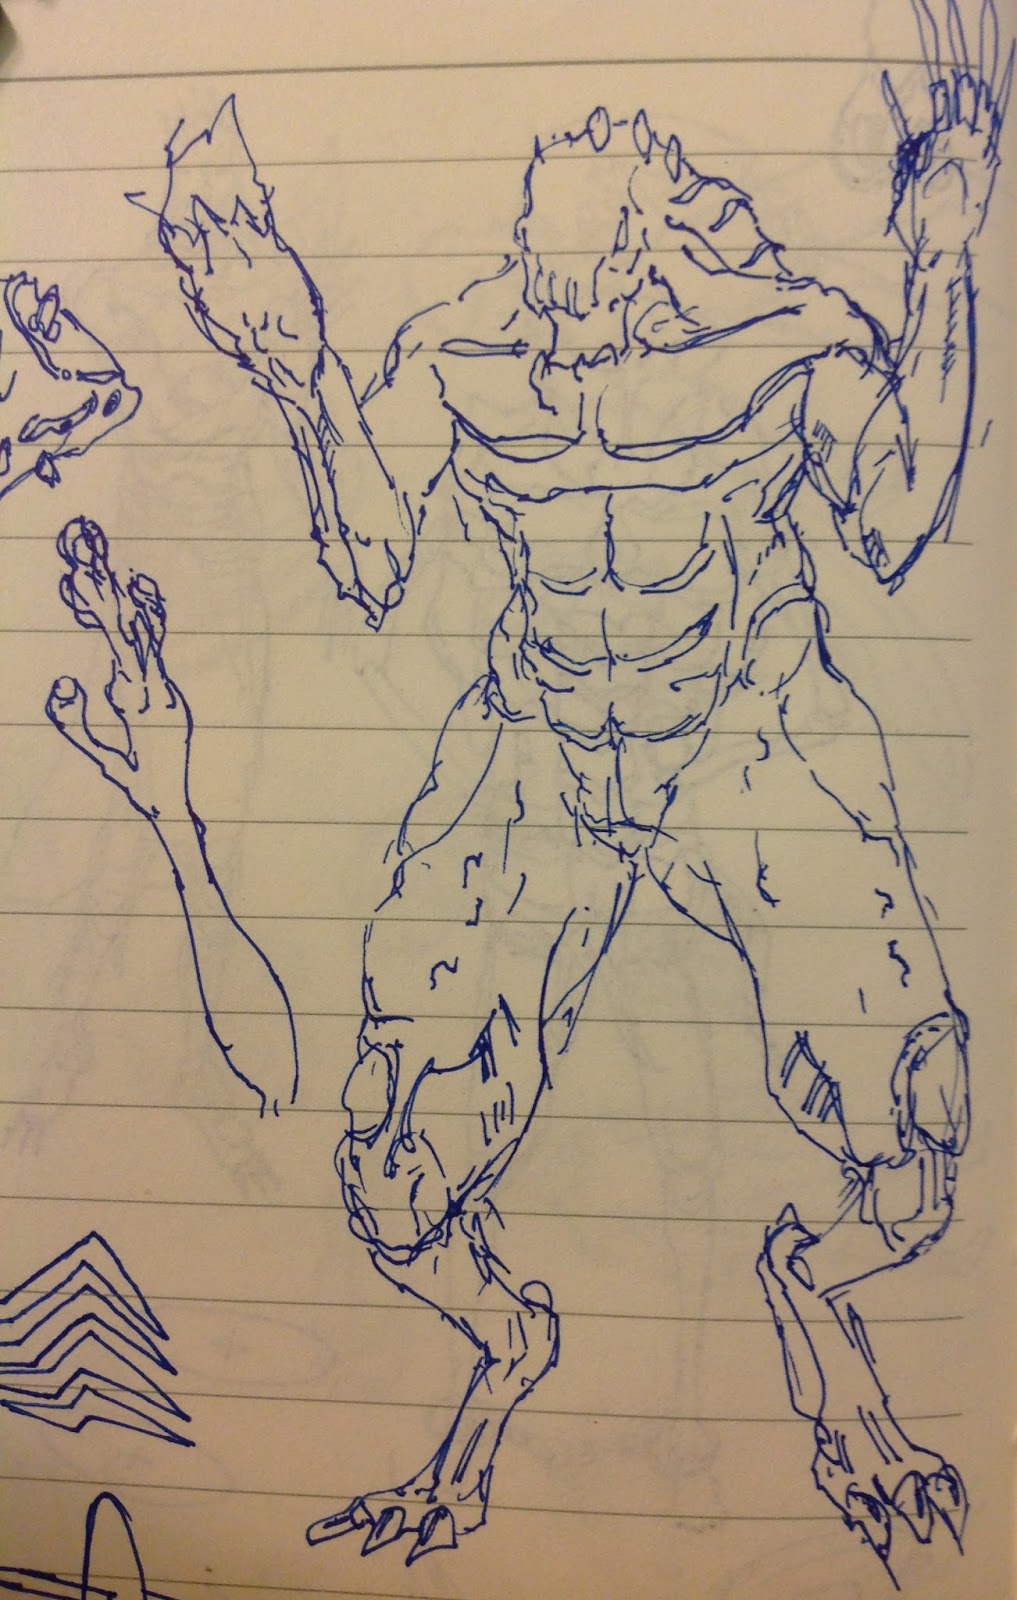
My MRT sketch book vol 16

  I join a project and wish to make some concept art about alien prison,and level up my paint skill.

Recently, I feel the chance always come to you unexpectedly !   HAHA !


2016年7月10日 星期日

5 tips on making great DLC from Dying Light: The Following devs By Techland staff _垂死之光:The Following團隊提供,5種製作出色DLC的技巧 著 : Techland staff


source from _ Gamasutra


5 tips on making great DLC from Dying Light: The Following devs

垂死之光:The Following團隊提供,5種製作出色DLC的技巧 


In this article, we wanted to give you some tips and tricks about making the best DLC you possibly can.
在這篇文章,我們想要給你一些,有關你可能做出很棒的DLC的技巧和竅門。

We tried to showcase practical examples from our accliamed DLC/expansion for Dying Light, called Dying Light: The Following, so that we don’t only explain the theory but share our experiences as well. Hopefully, there will be a lot you can take away from this and it will enable you to create the best DLCs out there.

我們試著從我們獲好評的DLC/垂死之光擴增,名叫垂死之光:The Following,去展示實際範例,所以我們不只解釋理論,也分享我們經驗。希望你能從中獲得,它能讓你製作出優質的DLC。

Tip 1: Level Design – Adrian Sikora, Level Designer

技巧1:關卡設計 - Adrian Sikora 關卡設計師

Designing such DLCs is always a huge challenge from a level design point and there is no single, universal recipe for a good DLC. You can take the easy path with "more of the same", but we wanted to do something extra – we wanted to keep all of what players liked in Dying Light, but also do something more at the same time.

設計類似這樣的DLC,總是一個龐大的挑戰,來自於關卡設計要點和沒有單一,一般方法就能做出好的DLC。你可以走簡單的路,使用"類似相同"方法,但我們想做些額外不一樣 - 我們想要所有的玩家像在垂死之光裡,同時也做同樣的事。
Looking for an idea for an expansion, we considered a lot of scenarios. We finally chose the vehicle as an element around which this addition could be built on. I think one of the most important elements of good design is to find something that will expand the gameplay, not destroy the current scope of the game.

找尋一個可以擴展的點子,我們思考了很多方案,我們最後選擇交通工具,當作一個物件,這個新增物件可以被增加。我覺得一個好的設計物件,最重要的一點,是可以找到擴大遊玩的要素,不是毀掉遊戲的目前範圍。
"The dirt buggies fit right in, providing both rewarding survivor strategy and moment-to-moment excitement."
The Following evolves Dying Light's formula by adding substantial new mechanics that compliment or even reframe familiar gameplay elements. The dirt buggies fit right in and provide both rewarding survivor strategy and moment to moment excitement.

The Following 進化垂死之光的公式,藉由增加大量新的受讚揚機械或重新勾勒熟悉的遊玩物件。髒污的越野車是最適合,同時提供有益生存策略和時時刻刻的刺激。
Another important element that contributed strongly to the level design of Dying Light: The Following was listening to the players – the game is at its best, when the player does not feel controlled. We’ve kept this in mind, and using a reputation system, changed the model of the game to be even more open than Dying Light was. I believe that this way, we’ve provided an element that every non–linear game is trying to achieve – a sandbox, in which everyone can have fun in their own way.

另一個重要的物件,極力推動垂死之光:The following的關卡設計,就是傾聽玩家- 這款遊戲最棒的地方,玩家感受不到被操控的感覺。我們要牢記在心,並使用信用機制,改變遊戲型態,比原來的垂死之光更加開放。我相信如此,我們提供一種要素,每個非線性遊戲試著想達成的 - 沙盒遊戲,如此每個人都可以照自己方式得到樂趣。

Tip 2: New Mechanic - Tymon Smektala, Producer

技巧2:新的機械-Tymon Smektala, 製作人

DLCs are often seen by gamers as quick cash-ins and that’s because quite often they’re nothing more than just additional content which reuses base game locations, enemies and gameplay mechanics. That can be OK - if a game is successful there are a lot of fans who just want “some more.” But if you really want to create a great expansion you need to be courageous and add something special. In our case it was the buggy.

DLC通常被玩家視為一種快速牟利並因為常常沒有什麼,只是增加一些重複利用基礎遊戲的位置,敵人和遊戲機關內容。這樣還過得去 - 如果這個遊戲是成功的,會有很多粉絲只是想要”更多”。但如果你真想做一款優質擴充,你需要是無畏並增加一些特殊要素。在我們的案子,它是台輕便越野車。
On the surface it might seem like a counterintuitive addition - Dying Light was all about parkour.

在表面上,它可能看起來是一台有悖常理的款式 - 垂死之光整體就是個"跑酷"
"We had to change nearly all of our game systems to make them work with the buggy -- starting with AI and ending with network code."
But we decided to add driving, which had the potential to completely kill our gameplay pillar. For us though, Dying Light was a game about being mobile, about overcoming obstacles - with style and speed - to go wherever the player wanted to go. Therefore it made sense to introduce something that takes that mobility to a new level - and present players with a new set of obstacles so they could overcome them.

但我們決定增加駕駛,這表示有可能完全抹煞我們的遊玩支柱。我們的想法,垂死之光是個有關移動,有關克服阻礙 - 擁有風格和速度 - 到玩家想去的地方,因此它就合理的展示,取得移動力到新的關卡,並且目前的玩家會有新的阻礙,所以他們要去克服。
Of course doing this is never easy. We had to change nearly all of our game systems to make them work with the buggy - starting with AI and ending with network code - but it also forced us to design a lot of new things.

當然要這麼做不簡單,我們幾乎必須改造我們的遊戲系統,讓它能夠與越野車運作 -- 先從人工智慧開始,到網路碼結束。這也迫使我們要設計新的機制。

At first we wanted to just “give” players the buggy, but then we realized that this will feel underdeveloped and will not be on par with the rest of our game systems. So we added upgrades and crafting to the core driving mechanic. This introduced a new way to customize the vehicle, created new types of challenges, and overhauled the UI. It was a lot of work, but I have a feeling that being ambitious and courageous (and maybe a little bit crazy) really paid off.

首先我們想要只是給玩家越野車,但後來我們發現這將會低度發展並無法和遊戲其他系統同樣水準,所以我們增加升級和改造核心交通工具,這拓展一種方式去客製化交通工具,創造一種新型挑戰,並大改UI,這會很耗工,但我有野心和勇氣付出(也許有點瘋狂)。

Tip 3: Redefined Tech – Grzegorz Swistowski, Technical Producer

技巧3:重新定義技術 - Grzegorz Swistowski,技術製作人

Making a DLC often just boils down to a small piece of content that fits in the broader game. However, we decided to change a number of things on the technical side that will give you not only a new skin or item to play with, but to change and enhance the game completely.

製作一個DLC常常只是概括整個內容的一小部分 ,符合開放遊戲。然而,我們決定在技術面改變一些東西,不止給你一個新的外表或品項,也徹底改變和提升遊戲。
"We felt that adding the huge terrain and changing the overall feel of the new map would extend and enrich the experience."
While we knew that our fans love parkour, we felt that adding the huge terrain and changing the overall feel of the new map would extend and enrich the experience. This switch from urban to rural setting allowed us to focus on a number of things so while focusing on the DLC, we were able to implement a lot of graphical and other enhancements, making the game look more beautiful. A lot of zombies wandering around on the fields; improved trees and plants; new types of landscape like plains, mountains and beaches are only but a few things we included in the DLC.

當我們知道我們的粉絲喜歡跑酷,我們覺得增加廣闊的地形,改變地圖的整體感覺可以延伸和豐富體驗。這種從都市轉變農村的設定,允許我們專注在幾件事上,因此我們投注在DLC上,我們可以實現許多影像和其他增強,讓遊戲看起來更漂亮。許多殭屍遊蕩在田野間,改進樹木和植物;新型景觀像是平原,山脈和海邊,但都是我們只增加在DLC的少數幾項。
The buggy is the best way to get around in The Following. We had to modify enemy AI and behavior and make sure that they interact with the buggy appropriately. While the new story and missions extend the player experience, we had to make sure that the new cutscenes, character animations are spot on as the NPCs have a very different state of mind from those in Harran.

在The Following裡,讓越野車四處移動,是最好的方式。我們必須修改敵人AI和行為,以及確定他們適當地與越野車互動。新的故事和任務會延伸玩家的體驗。來自Harran的NPC,有不一樣的程度,我們必須確保新的過場動畫,角色動作都完全正確。
Something to remember: redefining your tech and including new systems can be very risky, so only do it, if you have enough time and resources to do a stellar job.

要記住:重新定義你的技術,包含新的系統,會是非常冒險。要這麼作,如果你有足夠的時間和資源,才能做這永無止境的工作。

Tip 4: New Story - Kamil Krupinski, Narrative Designer

技術 4 : 新的故事 - Kamil Krupinski , 敘述設計師

The great thing about creating a storyline for an expansion is that it's possible to take a lot of liberties with the narrative. You can take the story into places the main game would've never allowed you to – you can explore themes and ideas that wouldn't be possible within the context of the "normal" experience.

為擴充創作故事大綱,最棒的就是有可能在敘述上有更多自由。你可以讓故事發生在主線遊戲不准你到的地方 - 你可以探索他們和一些不可能會是"平凡"體驗的點子。
"At first, we thought that creating a Fast & Furious slash Death Proof slash Mad Max type of story would work really well--after all, it's a game about driving over zombies. But we went back to the drawing board and asked ourselves a question: Is this what fans actually want?"
Another positive thing, one of the most obvious and (at the same time) important things, is that after the core game is released, you get a chance to understand your audience--at least the hardcore fans who will stay with you for a long time. You can try to make educated guesses as to what they really want, what they expect, what they find "fun" in your game and you can build upon that. Sometimes you will guess wrong, but with enough research, you will be able to give them what they want.

另一個好處,最顯著並且(同時)重要,在主體遊戲上市後,你有機會去了解你的玩家 -- 至少是會陪你們長時間的核心玩家。你可以試著猜測他們真的想要甚麼,他們期待甚麼,他們在你們的遊戲找到甚麼樂趣,然後你就可以製作出來。有時候你會猜錯,但由足夠的資料,你就可以給他們想要的。

Since The Following is an expansion built around the gameplay concept of adding a vehicle to a game fueled by parkour, one of the greatest challenges for us, the narrative department, was to decide on how much screen time should the Buggy actually get. Naturally, we thought that creating a Fast & Furious slash Death Proof slash Mad Max type of story would work really well, since – well – it's a game about driving over zombies…

因為The following是擴充包,建立在增加交通工具到遊戲中,由跑酷當作燃料。對我們最大的挑戰,就是企劃部門要決定,需要多少的時間得到越野車。自然地,我們想做一個玩命關頭加不死殺陣加瘋狂麥斯類型的故事,作起來應該不錯,恩-它是一個有關開車輾過僵屍的故事。
But we went back to the drawing board and asked ourselves a question: is this what fans of Dying Lightactually want? We figured out that no, our players aren't interested in a story about a car. They want a story about Kyle Crane.

但我們回到白板上,並問自己一個問題 : 這是粉絲想要的垂死之光嗎?我們認為不是,我們玩家對故事的車子沒興趣。他們想要有關Kyle Crane的故事。
So, since we were working on an expansion, we decided to, well, expand the story. To experiment a bit and takeDying Light into places it wouldn't normally go. We wrote a much darker storyline with Kyle Crane again at the center, and it seems, ultimately, that it resonated really well with our fans.

我們在製作擴充包,我們決定擴展故事,更多體驗,和讓垂死之光發生在一些平常到不了的地方。我們寫了很多和Kyle Crane的黑暗故事,它看起來,最終對我們粉絲產生共鳴。

Tip 5: Community - by Michal Napora, Community Manager

技巧 5: 社群 - by Michal Napora, 社群經理
With Dying Light: The Following, we wanted to create something that enhances player experience and adds to the world of Dying Light. Listening to fan feedback was essential. Players wanted the option for more progression, so we introduced the Legend system. This allowed for a new way of leveling up and added great value to the end-game content. For those who felt that the game was too easy, introduced the new Nightmare mode difficulty. More weapons like the SMG and the crossbow as well as new skins were long-wanted additions too.

垂死之光:the following上市,我們想做些提升玩家體驗的事情,並加到垂死之光的世界。聽取粉絲回饋是必要的。玩家想要更多發展的選擇,所以我們推出傳奇系統。這允許有新的升級方式,和增加已完結篇遊戲的價值。對那些覺得遊戲太簡單的人,推出新的惡夢困難模式。更多種武器,像衝鋒槍和十字弓也會有新外表,都是想要已久。
Some of our fans thought we could do better with the contents of the Season Pass, so when working onThe Following, we decided to include it in as part of it to add value. Clear communications to your fans can go a long way.

我們有些粉絲認為我們在Season Pass可以做更好,所以我們在The following ,我們決定包括它,增加它的內容,明白粉絲回饋可以讓遊戲走的長遠。
"Admit to your mistakes, if you made any, as that reinforces trust and goodwill towards your product." "不管是不是你做的,承認你的錯誤,強化信任和支持會站在你的產品這邊。"

When we realized that the DLC became so huge and costly, we announced what The Following is going to be about and that the Season Pass will increase in price. This gave players time to purchase it for the lower price for a while. This led to some very positive feedback, and our friends from Bethesda followed our example. We felt this was a way of the industry valuing and understanding the value of extra hard work.

當我們體認到,DLC變成龐大和昂貴,我們宣布The following將會是什麼走向和Season pass將會增加,都含在售價上。此時給玩家一段低價時間,這得到一些非常熱烈回應,而我們的朋友,Bethesda參考我們的例子。我們覺得這會是一種方式,讓產業價值提升和瞭解額外努力工作的價值。
The key to having a great DLC is to exhaust all types of content that you can possibly provide either in one huge DLC or give some content away for free. The#DrinkForDLC campaign was one of these initiatives. We also kept our docket codes going strong to provide some cool weapons to our fans.

掌握一個出眾DLC的關鍵在於,在大型DLC中,詳盡研究各種你可能提供的類型,或釋出一些免費內容。#DrinkForDLC比賽就是如此推出免費內容。我們也繼續增加取貨碼,提供更酷的武器給我們的粉絲。
Finally, there was a mistake to learn from. We announced the DLC seven months before it got released. In terms of promotion and communications, that’s a long time.

最後,我們從一個錯誤學習到,上市的前7個月,我們宣布DLC,這對推廣和散播而言,這實在是太長時間。
There were a lot of people who got upset because of this and this led to us doing an apology video. Admit to your mistakes, if you made any, as that reinforces trust and goodwill towards your product.

因此,有很多人生氣,而這也讓我們做了道歉影片。"不管是不是你做的,承認你的錯誤,強化信任和支持會站在你的產品這邊。
In short, focusing on community and morphing their ideas into yours will always allow you to create a great piece of content.

簡言之,注重在社群和整合他們的想法變成你們的點子,會讓你們總是製作出很棒的內容!


2016年7月5日 星期二

Empire of angels 4 launch now! 天使帝國4上市囉

Empire of angels 4 launch now! 天使帝國4上市囉!

In may and June, I worked on EOA4 ,I made two cutscenes of the end of EOA4. At first ,game designer wanted to make CG animation, but we just had one month and 2 people.

Therefore, I decided to use Usequencer in unity. It's fast to modify cutscenes ,but I previews cutscene sometimes did not present correctly.  EOA launched two weeks Before ,producer wanted to change the Ending of the EOA. Holy! That was really horrible for our team, it's complete overhaul!i overworked until 21:00 everyday and sometimes on sunday ,other one game designer live in company. HAHA, sound crazy! After our team spent a lot time and effort on it, we finished it finally,! Thanks God~~

I also made the CF & CF2, Hope you like !

CF1

CF2


2016年6月23日 星期四

Building PBR-environments for Games by Berer Siino __為遊戲建立PBR場景 Berer Siino

Reference : Berer Siino

BUILDING PBR-ENVIRONMENTS FOR GAMES
Interview

Freelance artist Berker Siino and former Crytek artist, who worked on Ryse, Crysis 2 and Crysis 3, gave a detailed breakdown of his new environment for Rick Future adventure games. This is an incredibly example of great PBR-environment created with very limited resources. Berker talked about the production of materials with Quixel SUITE, described the way he used Unity 5 and shared some of his signature tricks in this amazing breakdown.

自由工作者Berker Siino而且是前認Crytek美術,曾經在羅馬之子,末日之戰2 3,將講述他為Rick Future adventure games所作的新場景細節分析,這是一個不可思議運用非常有限的資源,所使用PBR-場景的範例,Berker和Quixel SUITE討論有關材質產品,敘述他在Unity的使用方法,和分享一些特別的技巧,都在這驚艷的解析。

Introduction

My name is Berker Siino and I am currently working as a freelancer. I have previously worked at Crytek for about 5 years. The beginning of my career started at the Games Academy in Berlin where I studied 3D art and also made the first connections to many of the local game developers, Crytek being among them. In the course of my professional career I collected credits on Ryse, Crysis 2, Crysis 3 and numerous other smaller projects. I also supported pretty much every licensee using CryENGINE during their game development efforts.

介紹

我的名字Berker Siino,我最近是一位自由工作者。我之前在 Crytek 工作5年,我一開始的生涯是在柏林的遊戲學院,我專攻3D 美術並且開始初次接觸當地的遊戲開發者,Crytek是其中之一。在我的職業生涯課題中,我被納入Ryse(羅馬之子), Crysis 2(末日之戰 2), Crysis 3(末日之戰 3)和其他許多小專案。我也被贊助想當多的認證使用CryENGINE,當他們的遊戲在開發時。
One of my personal highlights was to be one of the guys who exported the first Star Citizen ships and showcased a demo scene to Chris Roberts and Cloud Imperium Games while they were evaluating CryENGINE. Working at Crytek advanced my skills in all kinds of directions and I quickly became an ‘all­arounder’, getting proficient in many areas.. Being able to take on technical art roles and still having the passion of being a 3D modeler and texture artist made me a quite useful member of my team at Crytek.

我個人較突出的作品之一,星際公民開發第一艘Star Citizen 船,並展示一個範例場景給 Chris Roberts和Cloud Imperium,當時他們正在評估CryEngine。在Crytek工作,我的技術在各種方面都進步並且我很快變成一位"多工人員",精通在各個領域。為當一位技術美術職位,並且仍需要有熱情在3D模型和貼圖美術上,使我成為一位在Cryrek團隊中有用的成員。

The Rick Future Project  Rick未來專案

After leaving Crytek and working as a freelancer for a few years I started working with MetalPop Games. MetalPop, also made up out of ex­Crytek devs asked me to help them out with all their art and technical art tasks for the adventure game they were working on.

在離開Crytek並成為自由工作者幾年後,我開始和MetalPop Game合作。MetalPop,也是前Crytek開發者創辦的,找我幫忙他們正開發冒險遊戲的所有美術和技術美術的測試。
The project was first developed using CryEngine but was switched over to Unity with the release of Unity 5. When I joined, one of the first things I did was to develop a new art pipeline to utilize the full strength of Unity’s new rendering features.. Being a very small team with limited capacity Unity was simply the better choice to get results quickly.

專案一開始使用CryEngine,但Unity5釋出後,就轉成Unity。當我參與時,我第一件事要做的就是開發出新的美術生產線,採用Unity的新渲染特色的完整效能。對一個非常小的團隊搭配能力受限的Unity,是單純最好的選擇並快速得到結果。
I got the chance to do the art direction and develop a new style for the game, and I think getting the chance to this meant quite a lot to me as an artist. As usual with indie development and having no publisher picking up the tab, time and money are constant worries. As an artist I still want to go as near as possible to a AAA quality with our game though. Only having a strong pipeline could realize this, which is one of the reasons why I used Quixel Suite to automate and create textures fast in PBR fashion. I took the responsibility to design, model, texture and art direct all game scenes, all in quite a short time. Our first result was the benchmark level, we call the ‘Engine Room.’

我有一個機會為一個遊戲去做美術主導和發展新的風格,並且我想得到這機會,對我身為一位美術意義重大。通常與獨立開發商和沒有發行商買單,時間和金錢是一直都是急迫。身為一位美術,我依然希望我們的遊戲能盡可能接近AAA水準。只有擁有牢靠的工作流程才能實現。也是我為什麼使用Quixel Suite的原因之一,自動化和在PBR潮流中快速製作貼圖。我的職責是設計,建模,貼圖,並且美術指導所有遊戲的場景,所有事情都在短時間內要處理。我們第一個成果是基準關卡,我們稱"引擎室"

    quixel suite, cryengine, crytek, unity, unity 5, unity technologies, game development, materials, lighting, textures, modeling, gamedev, gamedev tutorial, game industryquixel suite, cryengine, crytek, unity, unity 5, unity technologies, game development, materials, lighting, textures, modeling, gamedev, gamedev tutorial, game industryquixel suite, cryengine, crytek, unity, unity 5, unity technologies, game development, materials, lighting, textures, modeling, gamedev, gamedev tutorial, game industry

Preparation and pipeline 準備和工作流程

The main goal of creating levels and scenarios as the only artist in the team was to keep things simple but at the same time don’t lose fidelity and the details of a AAA game. In a production with more artists you can keep one guy busy with an asset to make sure to keep the desired quality level.In indie development of course this is not always possible. The main approach to achieve the look I was going for is to make use of lights and reflections. Of course those are only given when working with normalmaps and roughness/gloss maps in PBR. The beauty of PBR of course, is that you can change lights without worrying about objects looking wrong in different light conditions. If you get the material values right from the beginning, that is. Quixel Suite is a great tool for that matter. You can start by adding a base material and tweak it to your needs and of course try to break the procedural look of the mask generation. Thankfully Quixel now has a painting tool which allows you to have more artistic freedom while creating your assets. I did not have much time to model out every detail on an asset therefore I made sure that the base chamfers of an asset had the highpoly information included. To add further details I used NDO which gave me also a fast way of masking out the elements for a color ID map.

當團隊只有一位美術製作關卡和場景,此時的主要目標讓事情簡單,但同時不要失去真實度和AAA遊戲的細節。與許多美術在量產期,你可以保持一位美術專注在道具上,確保想要的品質。在獨立開發的過程上,這並不會時常發生。最主要的方法,讓外型達到我要的,就是製作光和反射。當然這些只能在PBR有Normal map 和粗糙 / 平滑Map可以給與。漂亮的BPR課題,就是你可以改變光而不需要擔心不一樣光的狀況,讓物件看起來是錯的。如果你一開始的材質是對的,就沒問題。Quixel Suite就是一套為此而生的。你可以一開始新增一個基本材質,並且微調成你需要的,當然試著打散程式生成的MASK外型(過於規律)。謝謝 Quixel 有Paint Tool,允許你在製作物件時,有更多藝術自由度。我沒有太多時間,把物件細節都建出來,因此我確立一個物件的基礎倒角必須要包含高面數Poly資訊,我使用NDO增加更多細節,也給我一個快速方法去MASK物件,做出Color ID Map。
The normal maps got baked out in XNormal by using cages that you can generate in the 3d viewer.
Xnormal在3d viewer中,藉由 Cage 烘焙Normal Map。
Xnormal_cage
The more important maps to get out of the tool, were the normal map with the green channel up, the curvature map (could be also baked in DDO) and an ambient occlusion map. The color ID map can either be baked from a highpoly model with different colored materials assigned to it, or created during the detail pass in NDO. Also important is to get the Xnormal Tspace synced to the engine tangent basis. I was using a plugin for that during beta of Unity 5 and had to smooth the angles of objects in engine manually. I am not 100% sure but I think that got fixed by now and you can use the standard Mikk ­Tspace now.

使用這工具所得到的更重要的Map,就是帶有綠通道的Normal Map,Curvature map(可以在DDO烘焙)和AO Map。Color ID Map也可以用不一樣的材質球給予高面數模型,烘焙取得。或是在NDO建立細部的pass。Xnomal Tspace同步引擎的法線基礎也很重要。我是在Unity5beta版裡用外掛並且手動在引擎中把物件角度平滑化。我不是100%確定,但我想現在已經修補並你現在可以用基本的Mikk ­Tspace(Xnomal的功能)
normalmapTB
After getting proper working normalmaps you have a foundation to build up detail in NDO. It is all about planning the asset. For example if you would see an asset from the side and you add tons of detail on a flat surface, this would destroy the purpose. You need to add geometry to keep a working silhouette, that is without question but only in areas where it makes sense.

得到適當的能用的Normal map,你就有一個基礎可以到NDO去建立細節,看如何設計物件。例如你從邊緣看這物件,你會增加細節在平面上,這會破壞原來的目的。你需要增加幾何面試著保持物件輪廓,這不會有問題,而且有效。
normalmap_workflow
From this point on you generate all your masks and smart materials in DDO until you get your final texture. I highly recommend not using standard smart material and call it a day. You have to make sure to get rid of the generic look of procedural textures. Quixel is pattern based so you can scale them and that is pretty much it. But now we can use the paint tool to also add variation, which is great. The power of generating presets and smart materials was the reason why I chose Quixel suite to be part of my pipeline. After creating the input nodes like normal map and ambient occlusion I was able to automate textures based on my smart materials that worked already perfectly in my scene.
從DDO裡,你產出所有mask和聰明的材質這點,到得到你的最終貼圖,這一點。我不建議使用基礎聰明材質和就這樣結束。你需要讓他減少看起來是程序製作出來的貼圖。Quixel是模板為基礎,所以你可調整。但現在我們可以使用paint tool去增加變化,這很棒。製作一些預設和聰明材質是我選擇Quixel suite 成為我的工作流程的理由,製作Input節點類似Normal map和AO之後,我可以以我的聰明材質,自動化貼圖。
My library of presets and smart materials grew over the course of creating the scene and I was able to use it on other levels as well, to get the production speed up.

我預設的收藏和聰明材質在建立場景過程中,不斷成長。我也可以使用它在其他的關卡,讓製作速度提升。

Unity 5 Needs Plugins  Unity 5需要外掛

The problem that I had during creating the pipeline was that I didn’t have access to certain tools that I got used to while working with CryENGINE. Unity 5 doesn’t have a solution for decals for instance, which is really not understandable for me. I was hoping to use POM and certain other next gen dx11 features on decals which I couldn’t. We didn’t change the standard shaders however and stuck to them. I was mainly focusing on getting the big picture and not the craziest shader setups. Rick Future is a point n’ click adventure game, so you have certain camera shots that track and pan slightly along the movement of the protagonist. You can’t come up close to a wall like a FPS game. It will probably happen that the game gets changed to a more advanced shader system in the future but that is not the case for now. I used certain plugins like SE Natural Bloom & Dirt Lens from Sonic Ether, Light Shafts and Easy Decals though.

我在建立工作流程時的問題,就是當我在CryENGINE工作時,我習慣我沒有使用特殊工具。Unity 5 沒有為立即衰減做處理,這讓我不解。我希望可以使用POM (Parallax Occlusion Mapping )和DX 11的功能,但我不能。

Light and reflections 燈光 和 反射

We are using deferred rendering in our project with the specular PBR workflow. Therefore we can use many lights without killing the performance of the game. The way I start my light setup is usually out of a dark scene. I mean, what is better than adding controlled information to get a certain look instead of starting from a default lid scene? A scene usually uses 3 lights. Key light as a main source of light, rim light to highlight silhouettes and a fill light to boost some of the too dark shadow areas. At this point I set all my non­dynamic assets to be static to let the system know which assets getting bounce during light generation. That is also the way to get access to glow. And we did need glow for certain science ­fiction elements of the game. I used dynamic lights mainly for the key lights to get shadows and light variations in the game. At any time the lights can be baked though (make sure to generate a second uv with non overlapping uv shells for lightmapping).

我們使用deferred rendering(deferred rendering中文) (燈光與算圖介紹中文 英文)和specular PBR的工作流程在我們的專案 ,因此我們可以使用很多燈,而無需犧牲遊戲表現。因此我一開始光的設定通常是在黑暗場景中,我指的是,什麼會比增加控制資訊得到更精確的外觀,還是一開始就從有預設光的場景開始,來的更好? 一個場景通常使用3盞燈,Key light為主要來源光,Rim Light 打亮出剪影輪廓並且Fill Light提亮太過黑暗陰影的地方。在這點,我會設置非動態物件(non-dynamic assets)保持靜態(static),可以在燈光產生時,讓系統知道那一個asset得到反彈(bounce),這也可以得到發光(glow),我們需要為遊戲的科幻小說的物件發光,我主要使用動態光源(dynamic lights)當作Key light,去遊戲中,得到陰影和光的變化。在任何時間,光可以烘培,透過(確定有製作第2層UV,不需要重疊UV,是為Light mapping)

You can use objects that are almost invisible to cast glow as some sort of fake light source. The tunnel area behind the main engine for example got the bounce light from a transparent object.
你可以使用無形(invisible)物件主導發光,如一些造假的發光來源,以引擎後端的隧道區為例,反彈光來自透明物體。
This effect could also be achieved by baking the bounce and then hiding the object after bake.
這個效果也可以藉由烘焙反彈光並且烘焙結束隱藏物件取得。
Building PBR-environments for Games
Usually you start by adding key lights with a default value of 1 intensity on a logical way. I got 2 major light sources in my scene, the top light from ceiling neon lamps and the engine glow light with the light shaft, both of them casting shadows. At this point the GI is also being generated and you can tweak them as you like by adding more bounce for instance.
 通常你會從新增Key light開始,預設強度為1。我在場景使用2盞主要燈光,頂燈是用天花板日光燈,引擎發光帶有光束,兩者都投射影子。此時,GI也會被產生,你可以細調他們,藉由增加燈製作更多的反彈。
Building PBR-environments for Games
The next steps are to make sure to get a bit more light in general into the scene. You do that by either tweaking the main light sources or simply adding a few more in the room.

下一步,確定場景有得到足夠的燈。無論是調整主燈來源,或在空間中增加一些燈。
One more tip:  另一個技巧
Try to avoid as much overlapping of the light radius/range as you can. It causes overdraw and hurts the performance. If you have more lights you should try to avoid it.

盡你所能試著避開太多燈光區域重疊,它會導致透支(overdraw)並且傷到效能。如果你有很多燈,試著避開。
Building PBR-environments for Games
Once you got the base lights done, you set up your reflection probe and capture all the surrounding environment into one reflection map. You can set it to real time to see all changes updating live. Finish up the light setup by placing indirect lights from monitors and other smaller light sources that should cast light. You can change the appearance of a light by using what Unity calls ‘light cookies’. It is basically a black white mask and is used to project the light in different shapes. Light is one of the best tools to model out shapes and forms. You can define them and guide the viewer through your scene with it. For example: I added spot lights to some of the areas such as the big generator close to the camera on the bottom left of the screen mainly because of the gameplay mechanics. There is a puzzle element behind the hatch which needs to be solved. In a lot of games they use these lights to guide the player. A door for example has usually some sort of light source attached, maybe a torch or a lantern to show the way.

一但你確立基礎燈,你設完你的Reflection probe和取得整個場景的 reflection map 。你可以設定為即時(real time) 去觀察它的即時變化。從螢幕中和其他較小的燈光來源,放置間接光。你可以改變光的顯示,使用Light Cookies,它就是一張黑白Mask,被用來投射出不一樣形狀的光。光是建立形狀和型式的最棒工具之一。你可以定義它們和引導玩家通過你的場景。例如,我增加一盞spot light 到某個區域,像是巨大發電機靠近攝影機,主要位在畫面左下角,因為是可操控機械。有一個機關物件,在艙口後面,需要被解開。在許多遊戲他們使用光去引導玩家。例如一扇門,通常都有某種光在上面相連,也許是火把或提燈照出通道。

Post process, color grading and tone mapping


Building PBR-environments for Games

Also important is to add is a screen space ambient occlusion to merge the objects contact shadows into the environment. I added a few more glow related scripts to get the SE Natural Bloom effects like lens dirt and bloom. Most important is color grading and tone mapping, even if I did not use it in my final scene setup. I got the results simply by using color grading. There is a lot of documentation about what color grading is and how to do it, but in a nutshell it is basically the idea of taking a screenshot of your current level pasting it into photoshop, manipulate colors and then throw it back into the engine.

還有很重要的是增加一個screen space ambient occlusion(SSAO)去合併物件碰觸的陰影到場景上。我增加許多發光有關的腳本,去得到SE Natural Bloom效果,類似鏡頭髒汙和過曝。最最最重要的是Color Grading(分色)和Tone mapping,即使我不在我最後的場景使用。我使用分色得到一些結果。有很多有關什麼是color grading文件和如何使用,但簡而言之,它最基本概念就是到你的場景,用print screen截取一張screenshot,並貼在Photoshop,手動調色,並丟回引擎。(Color Correction Lookup Texture)
With tonemapping on the other hand you can use an S curved tone curve to enhance contrast in the middle range and compress highlights and shadows. I would recommend to keep it simple here, because with all of these tools it is easy to get confused. Get the basics right and then add stuff, and if it is too much take it away and re­add with a different approach if needed.

你也可以使用Tonemapping,使用S曲線,提高中間調對比,並壓縮高光與陰影的部位。我建議盡可能讓它簡易,因為那些校色工具很容易讓人混淆。先把基本弄對,再追加上去。如果太多就減少,並且再重新加入不一樣的方法,如果是需要的話。